We are in Indiana, in February, in nearly arctic conditions..
So... how about this?
When life gives you snow....
Lots of snow...
Grab the kids, get out the maple syrup and make candy!!
First make sure you find clean snow, I mean really clean snow.. pristine snow..you get the idea..
Then send a boy out to scoop said snow onto a cookie sheet.
When he brings it in , put it in the freezer. You probably could have guessed that, right?
You don't want your snow to melt while you are cooking your syrup.
Next, take about 2 cups more or less, of pure maple syrup and pour it in a pan.
You are going to boil this syrup to about 245*F..again, more or less.
The old-timers do this by the look of the syrup not the actual temperature.
(a side note: make sure you use a large pan! We boiled over and had to change pans at this point!)
It will start with bubbling, then foaming, and finally look a beautiful, shiny, amber color that is fairly smooth on top. Not so foamy anymore.
(Okay, it still kind of looks foamy, but it was much smoother - you'll be able to tell.)
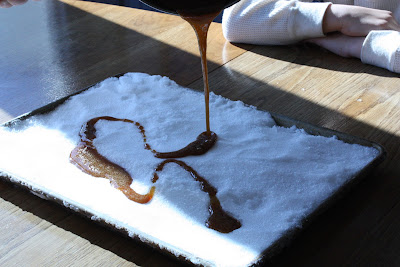
Now, it's ready to pour onto the snow. It hardens almost instantly! I gave my boys forks so they wouldn't burn their fingers, but they really didn't need them.
It doesn't keep very well, so you will be forced to eat everything you make, or feed it to the chickens.
If you have expensive dental work, or braces, I would pass on this. It will stick to your teeth like nobody's business! The only thing you can do is wait for it to melt.
It also makes really cool designs in the snow!
Super easy, yummy sweet, fun with a touch of pioneer history thrown in makes a great school activity!


No comments:
Post a Comment